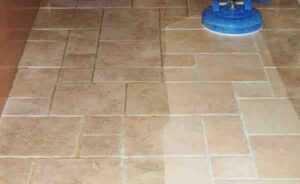
Beyond a Surface Clean: Why Mastering Your Carpet Cleaner Matters
Getting the most from your carpet cleaner isn’t just about pushing a machine around—it’s about knowing the right tips for using a carpet cleaner that transform your results from mediocre to professional-grade.
Quick Tips for Using a Carpet Cleaner:
- Vacuum thoroughly first – Remove loose dirt before wet cleaning
- Pre-treat stains – Spray problem areas 3-5 minutes before cleaning
- Use hot tap water – Increases cleaning power without damaging carpets
- Move slowly – Count “one Mississippi, two Mississippi” per step
- Do wet AND dry passes – Press trigger going forward, release coming back
- Don’t over-soap – Use only recommended amounts to avoid residue
- Extract moisture thoroughly – Multiple dry passes prevent mold
- Clean your machine after – Empty tanks and rinse parts to prevent odors
Your carpets do more than look nice. They trap dust, allergens, pet dander, and even mold spores that regular vacuuming can’t reach. Research shows that proper carpet care can significantly reduce allergy symptoms and extend your carpet’s life by years—some homeowners keep their carpets looking new for over 15 years with the right cleaning routine.
But here’s the catch: using a carpet cleaner wrong can actually make things worse. Too much soap leaves sticky residue that attracts dirt faster. Over-wetting leads to mold and mildew. Skipping dry passes means your carpet stays damp for days.
Whether you’re a busy Grove City resident tackling weekend cleaning or a business owner maintaining your space, understanding how to use your carpet cleaner properly saves you time, money, and frustration. Most people who rent or buy a carpet cleaner make at least one critical mistake their first time—mistakes that can leave carpets dirtier than before or even damage the fibers permanently.
The good news? Professional results are totally achievable at home when you know what you’re doing.

The Ultimate Guide: Pro Tips for Using a Carpet Cleaner
Here’s the thing about carpet cleaning: anyone can push a machine around, but getting that professional-level clean? That takes a little know-how. After years of changing carpets from dull and dingy to fresh and vibrant, we’ve learned exactly what separates okay results from truly spectacular ones. Let’s walk through the essential tips for using a carpet cleaner that will have your neighbors asking if you hired a pro.
Step 1: Preparation is Key for a Flawless Finish
The secret to amazing results starts before you even turn on your carpet cleaner. A little prep work now saves you from disappointment later—trust us on this one!

Clear the room completely. Move furniture, area rugs, toys, and anything else that might be in your way. For those heavy pieces you can’t budge, slide plastic sheeting or aluminum foil under the legs. This prevents moisture from the damp carpet from seeping into furniture legs and causing stains or damage.
Now comes the step that most people skip—and it’s a big mistake. Vacuum thoroughly first. We’re talking slow, deliberate passes in multiple directions. Why does this matter so much? Because you don’t want to turn all that loose dirt, dust, and pet hair into muddy sludge when you add water. Think of vacuuming as clearing away the surface debris so your carpet cleaner can focus on the deep-down grime. Use your vacuum’s attachments to get into corners and along baseboards. For best results, vacuum once in each direction.
Choosing the right cleaning solution is where things can go sideways fast. Always use a formula that’s designed for carpet cleaners—preferably one recommended by your machine’s manufacturer. We’ve seen too many well-intentioned DIYers grab whatever’s under the sink and end up with discolored carpets or sticky residue that attracts dirt like a magnet. Read those labels carefully and stick to products made specifically for your type of machine.
Before you commit to cleaning your entire carpet with a new product, test it in a hidden spot first. Pick an inconspicuous area—maybe inside a closet or behind a door—and make sure the solution doesn’t cause any discoloration or damage. This simple step can save you from a very expensive mistake.
Here’s a game-changer: pre-treating stains and high-traffic areas. Spray any visible stains or those worn paths where everyone walks with a pretreat formula. Let it sit for 3-5 minutes. This breaks down the bond between dirt and carpet fibers, making everything easier to lift when you run the machine over it. It’s like giving your carpet cleaner a head start on the tough stuff.
Finally, fill your machine’s tank with hot tap water—not boiling, just hot from the faucet—up to the fill line. Then add the exact amount of cleaning solution recommended in your manual. Hot water dissolves oils and stubborn stains way better than cold, giving you noticeably better results. And here’s a critical point: more soap does not mean a cleaner carpet. Use only what’s recommended. Your machine is designed to mix it at the perfect ratio, and too much soap leaves behind that sticky residue that makes your carpets look dirty again within days.
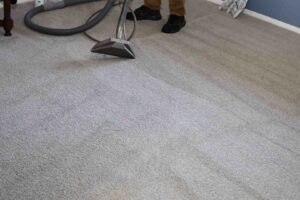
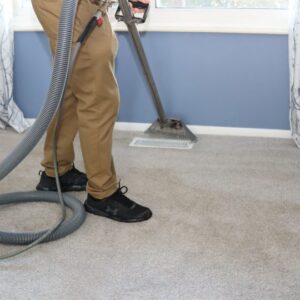
Step 2: Master the Cleaning Technique for Professional Results
Your carpet is prepped, your machine is loaded, and you’re ready to transform those floors. The way you actually operate the cleaner makes all the difference between “meh” results and “wow, did you hire someone?” results.
Start in the corner furthest from your exit. This way, you’re not tracking footprints across freshly cleaned carpet as you work your way out of the room. It’s a small detail that makes a big difference.
Here’s the technique that delivers professional-quality cleaning: the wet pass forward, dry pass backward method. As you push the machine forward, squeeze the trigger to spray cleaning solution onto the carpet. That’s your wet pass. Then release the trigger and pull the cleaner backward over the exact same path. This dry pass lets the powerful suction extract all that dirty water and solution from deep in the fibers. Effective machine operation techniques recommend going over each area at least twice this way—it’s what pulls up the really stubborn dirt.
Slow down. Seriously, this is huge. Moving at a measured pace gives the brushes time to scrub the fibers and allows the suction to pull up moisture. Try counting “one Mississippi, two Mississippi” for each step you take while pushing the cleaner. We know it feels slow, but you’ll be amazed at how much dirtier the water in your tank gets when you take your time.
Overlap your strokes by a few inches. This ensures you don’t miss any spots and gives your carpet a uniform, streak-free appearance. Think of mowing a lawn—you wouldn’t leave strips of tall grass between your passes, right? Same principle here.
The biggest mistake people make is over-saturating their carpet. Yes, you want it wet enough to clean, but leaving too much water behind leads to mold, mildew, and carpets that take days to dry. For really stubborn spots, it’s fine to do a couple of wet passes, but always follow up with extra dry passes (trigger released) to suck out as much moisture as possible. Your machine’s suction is powerful—use it! Going over an area two or three times without spraying pulls out that excess water and leaves your carpet much closer to dry.
Step 3: The Crucial Final Steps – Drying and Machine Care
Your carpets look fantastic, but don’t celebrate just yet. How you handle the drying process and care for your machine determines whether your results last or whether you end up with musty smells and a broken cleaner.
Make several extra dry passes over everything you just cleaned. This is your insurance policy against mold and mildew. The more moisture you extract now, the faster your carpets dry and the better they’ll look. Most carpets need at least four to six hours before you can walk on them, and they might not be completely dry for up to 24 hours.
Get air moving across those damp carpets. Open windows if the weather’s nice and not too humid. Point fans at the floor. Turn on your air conditioning or heat—anything that reduces humidity and circulates air will speed up drying time. A dehumidifier works wonders if you have one. Good airflow can cut your drying time in half.
Now let’s talk about your carpet cleaner itself. Clean it immediately after use—this is non-negotiable if you want your machine to last and not smell like a swamp.

Empty both tanks completely. Pour the dirty water down a utility sink or toilet—you’ll probably be shocked at how gross it is. Rinse the dirty water tank thoroughly and remove any hair or carpet fuzz you find stuck in there. Many machines have filter screens that need cleaning too.
Remove and rinse the brush rolls and nozzle. Check for clogs in the suction nozzle or hose—bits of carpet fiber and pet hair love to get stuck in there and block airflow. Wipe down the underside of the machine and let all removable parts dry completely before you put everything back together.
Empty and rinse the clean water tank as well. You don’t want any dirty water or cleaning solution sitting in your machine when you store it. This simple maintenance prevents odors, prevents mold from growing inside, and keeps your cleaner working like new. If you rented the machine, cleaning it thoroughly before returning it can save you from cleaning fees too.
For more detailed guidance on deep cleaning techniques and keeping your carpets in top shape, check out our guide on carpet deep cleaning methods.
Advanced Tips for Using a Carpet Cleaner on Tough Stains
Sometimes a general cleaning pass isn’t enough. When you’re dealing with specific types of stubborn stains, you need specialized strategies to tackle them effectively.
Pet stains require quick action and the right products. Blot up as much of the mess as possible immediately—don’t rub, just blot. Then reach for an enzyme cleaner designed specifically for pet accidents. Enzyme cleaners break down the odor-causing bacteria instead of just masking the smell. Spray the area, let it sit for the recommended time, then use your carpet cleaner with a pet-friendly solution to extract everything. For dried pet stains that have set in, a mixture of white vinegar and water can help neutralize odors before you clean.
Wine stains strike fear into every carpet owner’s heart, but they’re manageable if you act fast. Blot immediately with a clean white cloth—never rub, because rubbing pushes the stain deeper into the fibers. Keep blotting until you’ve absorbed as much as possible. Flush the area with plain water and blot again. An old trick for fresh wine spills is covering the spot with salt overnight, then vacuuming it up in the morning. For stubborn wine stains that have dried, a solution of hydrogen peroxide and a drop of dish soap can work wonders, but test it first in a hidden spot.
Oil-based stains like grease or wax need a different approach. For candle wax, place a damp white towel over the wax and press it with a warm iron for a few seconds. The heat transfers the wax from your carpet to the towel. Repeat with a clean section of towel until all the wax is gone. For grease or oil, blot with paper towels first, then place fresh paper towels over the stain and apply a warm iron. The heat helps the paper towels absorb the oil. For gum stuck in your carpet, freeze it with ice cubes until it hardens, then you can usually peel or scrape it right off.
Blood stains must be treated with cold water only—hot water will set the stain permanently. Blot fresh blood with cold water and a clean cloth. For dried blood, make a paste from salt and a little cold water, apply it to the stain, let it sit for a few minutes, then blot and extract with your carpet cleaner. Hydrogen peroxide can also break down dried blood, but test it first.
Always work from the outside edge of any stain toward the center. This prevents spreading the stain outward and making it bigger. And never skip that spot test when trying a new cleaning solution or technique—a few minutes of testing can prevent permanent damage to your carpet.
For comprehensive guidance on handling these and other challenging stains, explore our specialized carpet cleaning services page.
Common Mistakes and Maintaining Your Clean
You’ve learned the best tips for using a carpet cleaner, but let’s be honest—even with the best intentions, it’s surprisingly easy to trip up. The difference between carpets that stay clean for months and ones that look dingy within weeks often comes down to avoiding a few critical mistakes.
Top 3 Mistakes That Ruin Your Results
We’ve seen countless homeowners accidentally sabotage their own hard work. Here are the three biggest culprits we encounter, and more importantly, how you can avoid them entirely.
Using too much soap is hands-down the most common mistake. There’s this natural instinct to think more bubbles equal more clean, right? Unfortunately, carpet cleaning works the opposite way. When you use excessive shampoo, it creates a sticky residue that clings to your carpet fibers even after drying. This residue then acts like flypaper for new dirt, dust, and grime. Your carpets will actually look dirty again faster than if you’d used less solution! We’ve seen carpets that were spotless after cleaning turn gray within a week simply because of leftover soap residue. Always stick to the manufacturer’s recommended amounts—your carpet cleaner is designed to mix the solution at the perfect ratio. And equally important, make sure you’re using the wrong cleaning products designed specifically for carpet cleaners. That all-purpose household cleaner or dish soap might seem like a good substitute, but it can damage fibers, cause discoloration, or leave even worse residue behind.
Aggressive scrubbing is another trap that catches well-meaning cleaners. When you spot a stubborn stain, your first instinct might be to really go at it with elbow grease. But here’s the thing: your carpet cleaner’s rotating brushes are already doing the scrubbing for you. When you press down hard or vigorously scrub by hand, you’re not helping—you’re actually damaging carpet fibers, fraying them, or pushing the stain deeper into the backing. Let the machine do its job. If a spot needs extra attention, go over it multiple times with the cleaner, or use a soft brush to gently work in pretreatment, but never attack it like you’re scouring a pot. The same principle applies to over-wetting. Soaking your carpet with too much water doesn’t make it cleaner—it just takes forever to dry and creates the perfect environment for mold and mildew. Over-saturation can even damage the carpet backing, causing shrinkage or delamination where the backing separates from the fibers. Remember those dry passes we talked about? They’re not optional—they’re essential.
Walking on wet carpet might seem harmless, but it’s one of the fastest ways to undo all your hard work. When carpet is damp, it’s incredibly vulnerable. Even if your feet are clean, you’ll transfer oils, dirt from other surfaces, and debris back into those freshly cleaned fibers. We’ve seen people finish a beautiful cleaning job, then immediately walk across it to move furniture back, completely re-soiling the high-traffic path. Patience is your friend here. Keep everyone off the carpet until it’s completely dry—that includes pets! Similarly, don’t rush to replace furniture. Metal furniture legs can leave rust stains on damp carpet, and wood finishes can transfer color. If you absolutely must put furniture back before the carpet is bone-dry, use plastic furniture tabs or aluminum foil squares under each leg as a protective barrier. Your carpet needs time to dry and settle—give it that gift.
Your Carpet Maintenance Schedule
Now that you know what to avoid, let’s talk about keeping your carpets in that just-cleaned condition for as long as possible. The secret isn’t one big cleaning session—it’s consistent care throughout the year.
For everyday spills and accidents, speed is everything. The moment something hits your carpet, grab a clean cloth and blot it up. Don’t wait until later, don’t let it sit overnight—act immediately. Fresh spills come up easily; dried ones become permanent stains.
Weekly vacuuming is non-negotiable. We know life gets busy, but vacuuming at least once a week (more in high-traffic areas) makes an enormous difference. It removes the loose dirt and debris before they get ground into the fibers, and it dramatically reduces allergens and dust mites. This simple habit can extend your carpet’s life by years.
Deep cleaning frequency depends on your household. If you have pets, kids, or family members with allergies, you’ll want to deep clean every 3-6 months. The extra foot traffic, pet dander, and spills in busy homes mean more frequent cleaning keeps things fresh and healthy. For quieter households without pets, deep cleaning every 6-12 months is usually sufficient. Some carpet manufacturers actually require regular cleaning to maintain warranties, so check your documentation.
When it comes to equipment, you’ve got choices. Renting a carpet cleaner from your local hardware store works great for occasional use—these machines are powerful and much cheaper than buying if you only clean once or twice a year. However, buying your own machine makes sense if you have a large home, multiple pets, or just want the convenience of cleaning whenever a spill happens. There are excellent consumer models available that rival rental machines in power. The right choice really depends on how often you’ll use it.
That said, there’s real value in calling the professionals periodically. At A Plus Carpet Cleaning, we use commercial-grade equipment that extracts more water and dirt than consumer machines can manage. We have access to professional-strength solutions and the experience to handle tough stains without damaging fibers. Professional cleaning also helps maintain your indoor air quality and can tackle issues like embedded odors or allergens that DIY methods might miss. Here in Grove City and throughout Columbus, we combine powerful equipment with expertise to deliver results that home machines simply can’t match.
Not sure whether to tackle it yourself or call us? Consider the age of your carpet, how severe the stains are, and honestly assess your comfort level with the job. Some situations—like water damage, extensive pet staining, or very old carpets—really benefit from professional attention. For guidance on making that decision, check out our page on when to hire a professional carpet cleaning service. We’re always happy to answer questions and help you figure out the best approach for your specific situation.

Mastering these tips for using a carpet cleaner puts you in control of your home’s cleanliness and comfort. With the right preparation, technique, and ongoing maintenance, you can achieve professional-quality results and enjoy beautiful, fresh carpets for years to come. Your home deserves it, and honestly, so do you.